 Save
Save Last summer my neighbor texted me at 9 PM asking if I had any chocolate in the pantry. Her kids were begging for s'mores but nobody felt like building a fire in the backyard. We ended up melting chocolate bars on graham crackers in her oven with marshmallows on top, standing around the kitchen island while the marshmallows turned golden and bubbly. The kids went quiet for exactly seven minutes. That night I started thinking about how to capture that magic in bar form, something you could pack for a picnic or bring to a potluck without needing a campfire.
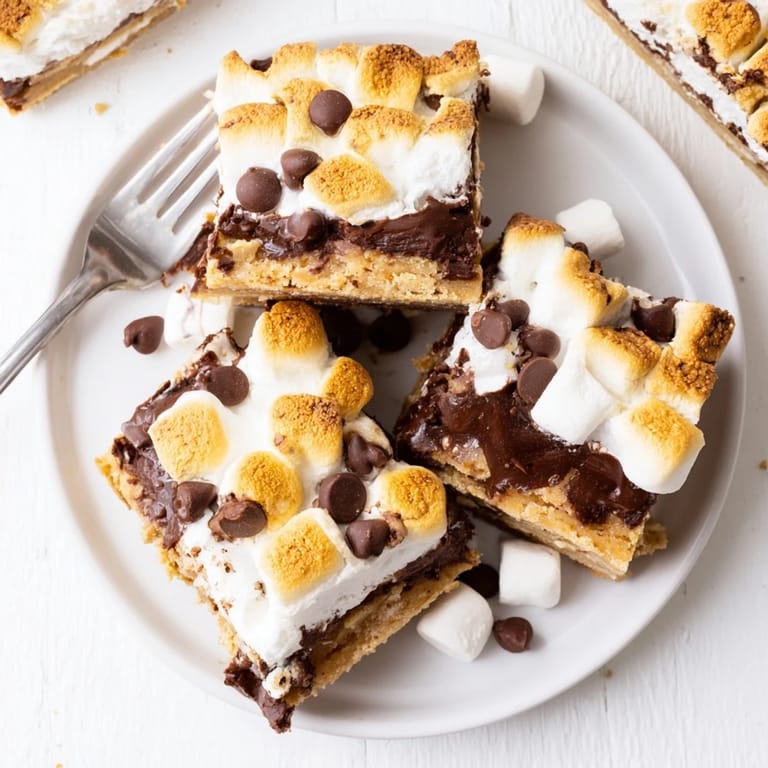
I made these for my book club last month and watched three normally reserved adults fight over the last corner piece. There's something about that combination of textures, the snap of the graham cracker base giving way to melted chocolate and toasted marshmallow, that makes people revert to childhood. One friend admitted she ate two bars before we even started discussing the book. I've started keeping the ingredients in my pantry for emergency dessert situations, which happen more often than I'd care to admit.
Ingredients
- Graham cracker crumbs: The foundation of everything. I pulse whole graham crackers in my food processor, but the pre-crumbled ones work perfectly fine too. Just make sure you measure after crushing, not before.
- Unsalted butter: Melted butter helps the crust hold together and adds that rich, buttery flavor that makes graham crackers taste like home. Let it cool slightly before mixing so it doesn't start cooking the sugar.
- Granulated sugar: Just enough to sweeten the crust and help it crisp up in the oven. The crust should taste like a graham cracker, not a cookie.
- Semi-sweet chocolate chips: I've tested this with milk chocolate and dark chocolate, but semi-sweet hits that perfect sweet spot between too sugary and too intense. Spread them while they're soft, not fully melted, for the best layer.
- Mini marshmallows: The small ones melt more evenly and toast more quickly than the big ones. Press them gently into the chocolate so they don't roll off when you're moving the pan.
Tired of Takeout? 🥡
Get 10 meals you can make faster than delivery arrives. Seriously.
One email. No spam. Unsubscribe anytime.
Instructions
- Get your oven ready:
- Preheat to 350°F and line your 8x8 pan with parchment paper. Trust me about that overhang, it will save you so much trouble later when you're trying to lift the bars out.
- Build the crust:
- Mix your graham cracker crumbs with melted butter and sugar until everything is evenly coated and looks like wet sand. Press it firmly into your pan using the bottom of a measuring cup or glass, getting it into the corners and making it as even as possible.
- Pre-bake the base:
- Bake the crust for 8 minutes until it smells like graham crackers and looks slightly golden around the edges. This step keeps the crust from getting soggy when you add the chocolate layer.
- Melt the chocolate:
- Scatter your chocolate chips evenly over the warm crust and return to the oven for just 2 minutes. You want the chips soft and glossy, not fully melted into a puddle.
- Spread it smooth:
- Use an offset spatula or the back of a spoon to gently spread the softened chocolate into an even layer. Work quickly but gently, you don't want to mix the chocolate into the crust.
- Add the marshmallows:
- Scatter the mini marshmallows over the chocolate and press down very lightly so they adhere. Don't overcrowd, they'll puff up dramatically in the oven.
- Toast to perfection:
- Bake for 10 to 12 minutes until the marshmallows are golden brown on top and slightly puffed. Keep a close eye after 8 minutes, they can go from golden to burnt pretty quickly.
- The hardest part:
- Cool completely in the pan, then refrigerate for at least an hour. This step is non-negotiable if you want clean cuts instead of a chocolate marshmallow mess.
- Slice and serve:
- Use the parchment overhang to lift the whole block onto a cutting board. A sharp knife dipped in hot water and wiped clean between cuts will give you the cleanest squares.
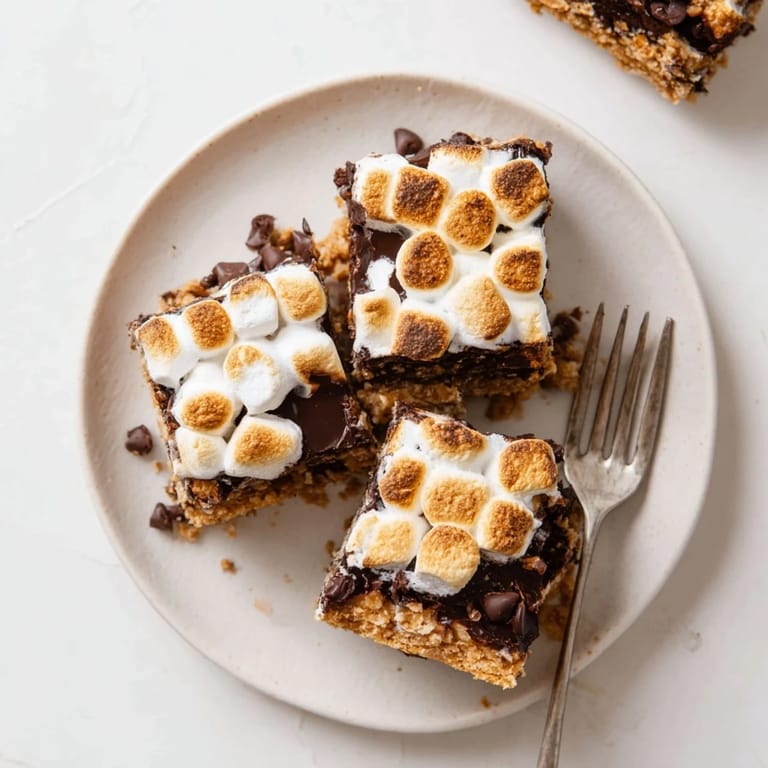
 Pin it
 My daughter requested these for her classroom Halloween party instead of cupcakes this year. The teacher emailed me afterward asking for the recipe because the kids kept talking about them for days. Something about that campfire flavor combination just clicks with people, brings back memories even if you've never actually been camping. Now they're my go-to whenever I need to bring something that guarantees both kids and adults will be happy.
Getting That Perfect Golden Toast
Watch your marshmallows like a hawk during those final minutes. I set my timer for 8 minutes and then stand by the oven, because the difference between perfectly golden and slightly burnt is maybe 60 seconds. The broiler method works too, but I find the oven gives you more control and a more even toast. If you do use the broiler, leave the door cracked and keep it under 2 minutes.
Making These Your Own
Once you've got the basic technique down, the variations are endless. I've added a layer of salted caramel between the chocolate and marshmallows, sprinkled sea salt on top after baking, even crushed some graham crackers over the marshmallows before the final bake for extra crunch. My personal favorite swap is using dark chocolate chips instead of semi-sweet, especially if you're serving these to adults who appreciate that bittersweet edge against the sweet marshmallow.
Storage And Serving Tips
These bars will keep at room temperature for about 2 days, but I've found they actually improve overnight as the flavors meld together. After that, move them to the refrigerator where they'll stay fresh for up to a week, though I've never personally tested them past day 3 because they disappear. If you're transporting them, pack them between sheets of wax paper in a rigid container.
- For maximum gooeyness, microwave individual bars for 10 seconds before serving
- Cut them into smaller squares if you're serving these as part of a larger dessert spread
- The parchment paper trick is worth repeating, it makes the whole process so much easier
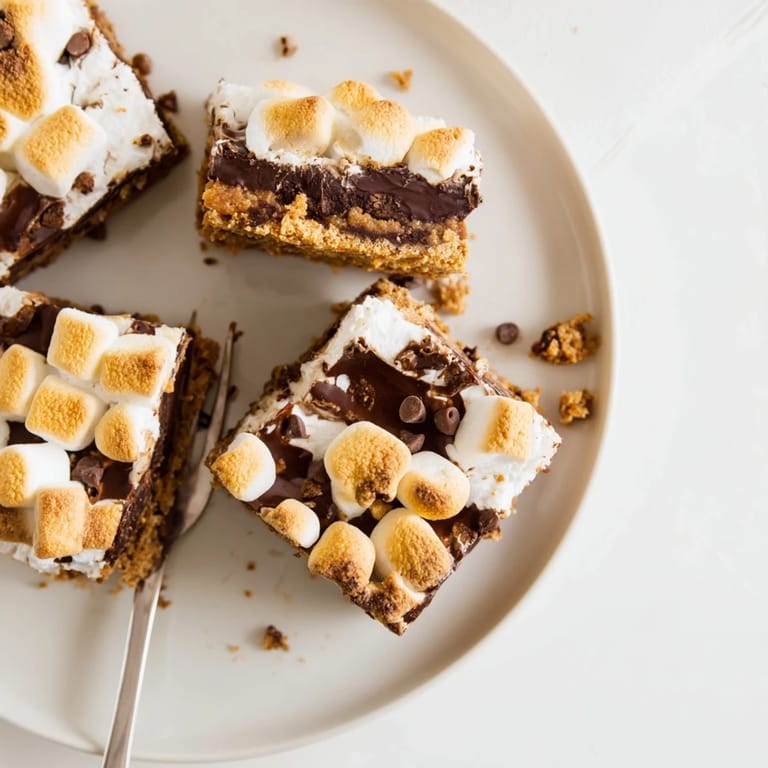
 Pin it
 There's something almost magical about how these bars capture everything people love about s'mores without needing a fire pit or perfect weather. They're messy, they're sweet, and they're absolutely worth every sticky fingered bite.
Frequently Asked Questions
- → Can I make these ahead of time?
Yes, prepare up to 2 days in advance and store in an airtight container at room temperature. The bars actually cut cleaner when chilled for an hour before slicing.
- → What type of chocolate works best?
Semi-sweet chocolate chips provide balanced sweetness, but you can use milk chocolate for a sweeter version or dark chocolate for a richer, less sweet variation.
- → Can I use regular marshmallows instead of mini?
Yes, simply cut regular marshmallows into smaller pieces before scattering over the chocolate layer. Mini marshmallows melt more evenly and create a better texture.
- → How do I get the marshmallows golden without burning?
Watch closely during the final 10-12 minutes of baking. Marshmallows go from golden to burned quickly, so check every few minutes once they start toasting.
- → Can I freeze these bars?
Yes, wrap individual bars in plastic wrap and freeze for up to 3 months. Thaw at room temperature for 30 minutes before serving for best texture.
- → What can I substitute for graham crackers?
Digestive biscuits work well as a substitute, maintaining that sweet, slightly sandy texture that pairs perfectly with chocolate and marshmallow.