 Save
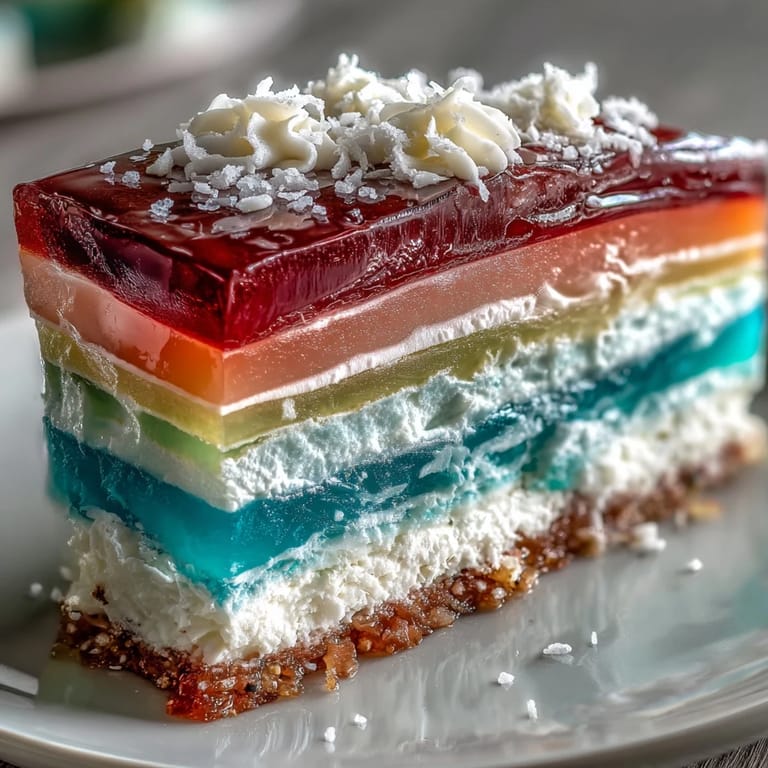
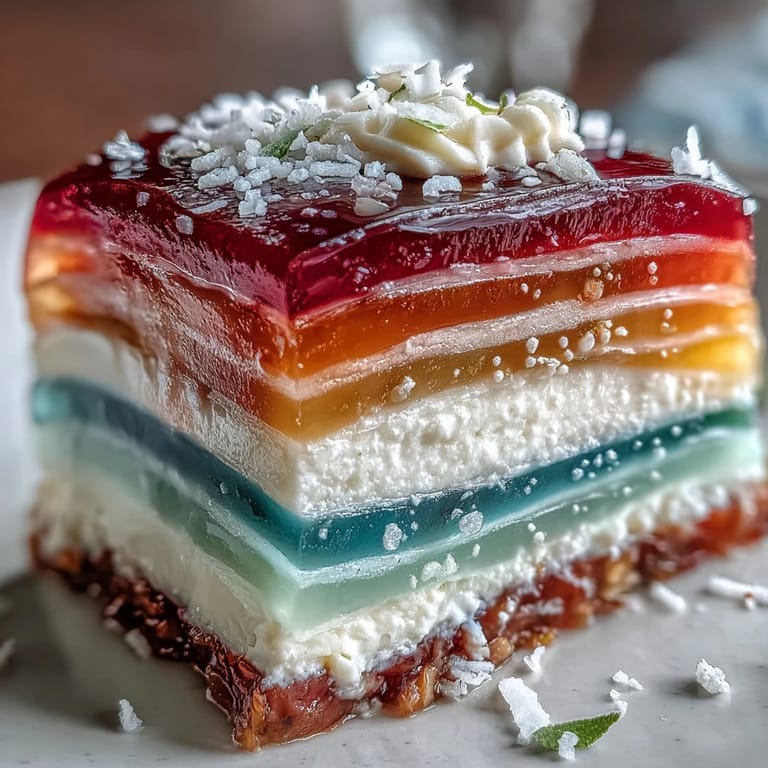
Save A kaleidoscope of colors swirling in a single dessert—who could resist the temptation of cutting into a Rainbow Jelly Cake for the first time? The soft bounce of agar-agar, the fragrant hit of coconut, and the hypnotic stripes bring a little festivity to even an ordinary afternoon. On my first attempt, a late summer thunderstorm provided a wild playlist as I hovered over the stove, watching each layer set like magic. That satisfying “plop” sound as jelly released from the mold—honestly, it never gets old. With every slice, there’s a feeling of accomplishment and playfulness, as though you’ve conjured something joyful out of thin air.
One afternoon, I found myself layering jellies with my niece, both of us dipping spoons to check if the rainbow stripes had set. She painted a streak of blue onto her wrist “just to test the color,” and we laughed so hard that our hands shook as we poured the layers. The kitchen was filled with the aroma of coconut and vanilla, and our rainbow creation became the centerpiece of a family tea later that day. That memory is now forever blended with the taste and texture of this dessert. Who knew a handful of simple ingredients could bring about so much cheer?
Ingredients
- Agar-agar powder: Makes the clean, bouncy jelly texture; dissolve completely for the smoothest layers.
- Water: Essential for dissolving agar and creating those pristine see-through colors; boiling water distributes the powder evenly.
- Granulated sugar: Sweetens just enough to balance coconut; don't rush melting it for the glossiest finish.
- Food colorings (red, orange, yellow, green, blue, purple): Go bold for dramatic stripes, or try pastel for a softer effect; mix thoroughly for even color.
- Vanilla extract (optional): Lends a gentle aroma layer—add at the end for the best flavor preservation.
- Coconut cream: Gives the dessert a silky, tropical richness; use full fat for extra indulgence.
- Pinch of salt: Heightens every flavor note in the coconut layer; never skip it.
Tired of Takeout? 🥡
Get 10 meals you can make faster than delivery arrives. Seriously.
One email. No spam. Unsubscribe anytime.
Instructions
- Create the Rainbow Base:
- In a medium saucepan, stir together the agar-agar powder with water and bring to a lively boil on medium heat, whisking so no clumps remain and all the agar dissolves smoothly. Add sugar and optional vanilla, let it dissolve until you get a crystal-clear syrup.
- Divide and Color:
- Take the pot off the heat, split the jelly into six bowls, then work quickly to tint each with a few drops of food coloring. Swirl until vivid streaks bloom, and set the bowls aside, keeping them warm if possible.
- Mold the Layers:
- Pour the red layer first into your mold, swirling gently to smooth; wait 5–8 minutes until lightly set but not firm. Repeat the process with each color, layering carefully and letting each layer set before pouring the next so colors don’t bleed.
- Stir up the Coconut Layer:
- Clean your saucepan, and combine coconut cream, water, and agar-agar powder, bringing it to a low simmer while whisking energetically. Add the sugar and pinch of salt last, making sure everything is lush and blended.
- Finish with Coconut:
- Once your rainbow is set, pour the plush coconut cream slowly over the layers, releasing any bubbles with a skewer, then let it cool completely on the counter. No peeking in the fridge yet—patience helps avoid condensation on the surface.
- Chill Firm:
- Transfer the mold to the refrigerator and wait at least an hour for the cake to firm up; the anticipation is part of the fun. It should feel jiggly but hold its shape when ready.
- Unmold and Slice:
- Gently run an offset spatula or knife around the edges, invert, and— with a tiny prayer—lift the mold away to reveal those stripes. Slice into cubes or wedges and serve cold for maximum refreshment.
 Pin it
  Pin it
 There was a party where this cake landed smack in the middle of the table—unannounced and unapologetically colorful. Watching guests’ puzzled faces dissolve into wide grins as they took a bite made all the stirring, layering, and waiting more than worth it.
Getting the Cleanest Slice
Use a sharp knife dipped in hot water and wipe between each cut to achieve pristine, beautiful rainbow cross-sections. That little bit of extra care turns your jelly cake into edible stained glass that steals every glance at the table.
Customizing Your Rainbow
Try flavoring some layers with a drop of pandan or rose extract to surprise your guests with subtle new notes peeking through all that color. Natural food dyes (think beet, turmeric, spirulina) create a more muted palette if you prefer something earthy and gentle.
Making Ahead and Storing
One of the joys is that you can prepare this cake a day in advance; it actually slices better chilled overnight. Store it covered in the fridge up to three days—though in my house, leftovers are more myth than reality.
- Lay a piece of wax or parchment paper between slices to prevent sticking.
- Use airtight containers for freshest texture.
- Wipe off any condensation before serving for the prettiest finish.
 Pin it
 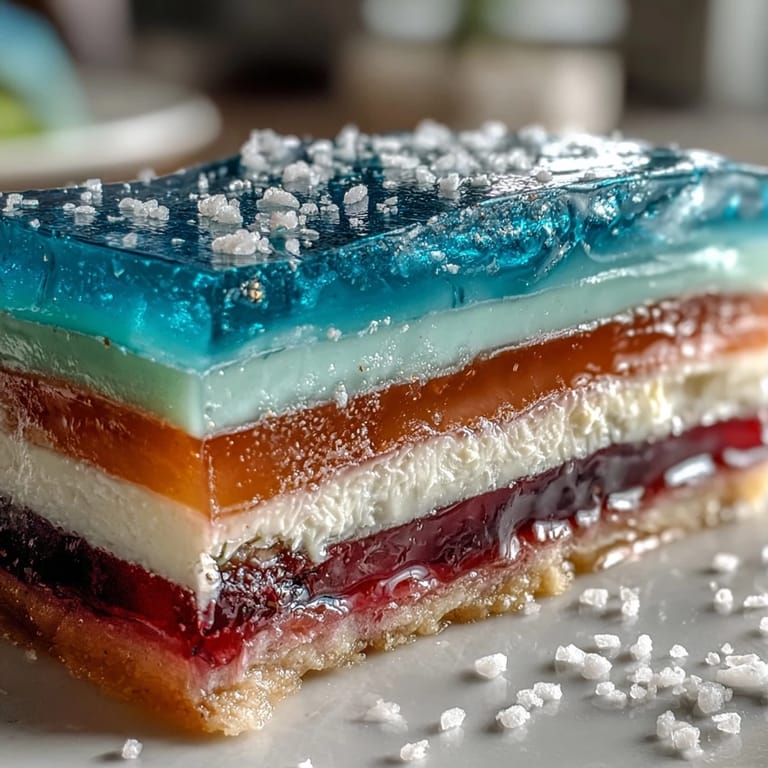 Pin it
 Rainbow Jelly Cake isn’t just food—it’s a little edible celebration, easy to share and hard to forget. See how many smiles you collect with each slice.
Frequently Asked Questions
- → How does agar-agar behave compared to gelatin?
Agar-agar sets firmer and at room temperature, producing a more jelly-like, slightly brittle texture. It dissolves in boiling liquid and sets as it cools, so heat and dissolve thoroughly for smooth layers.
- → How do I get clean, even layers?
Pour each colored batch when the previous layer is just set but still slightly warm to the touch (about 5–8 minutes). Pour gently from a low height or along the back of a spoon to avoid disturbing underlying layers.
- → Can I use natural colorings?
Yes. Use concentrated natural options like beet for red, carrot or paprika for orange, turmeric for yellow, spinach or pandan for green, butterfly pea for blue, and purple sweet potato for purple. Adjust quantities for vibrant hues.
- → How do I ensure a silky coconut cream layer?
Heat coconut cream, water and agar-agar gently, stirring until fully dissolved. Strain if needed, and cool slightly so the mixture is warm, not hot, before pouring to prevent melting the top color layer.
- → What mold and tools work best?
Use a 20 cm round or rectangular mold for even slices. A medium saucepan, heat-proof bowls for tinting, a whisk, and an offset spatula or knife to loosen edges give the best results.
- → How long will the finished dessert keep?
Cover and refrigerate; it keeps for up to 3 days. Texture may firm slightly over time—bring to serving temperature in the fridge and slice with a sharp knife for neat portions.